Simple Instructions for Repairing a Leaky Waste Disposal
Simple Instructions for Repairing a Leaky Waste Disposal
Blog Article
This great article following next in relation to Tips on Fixing a Leaking Garbage Disposal is particularly enjoyable. Give it a try and draw your own personal findings.

Garbage disposals are vital kitchen area appliances that assist in dealing with food waste effectively. Nevertheless, a leaking waste disposal unit can be a frustrating and untidy problem to take care of. Luckily, several leaks can be taken care of conveniently with a few easy actions. In this article, we will talk about exactly how to deal with a dripping waste disposal unit effectively.
Introduction
Garbage disposals are installed under kitchen sinks and are designed to shred food waste right into smaller sized items, enabling it to go through the plumbing system conveniently. While these gadgets are typically reputable, leaks can occur over time as a result of damage, loose links, or damages to the unit.
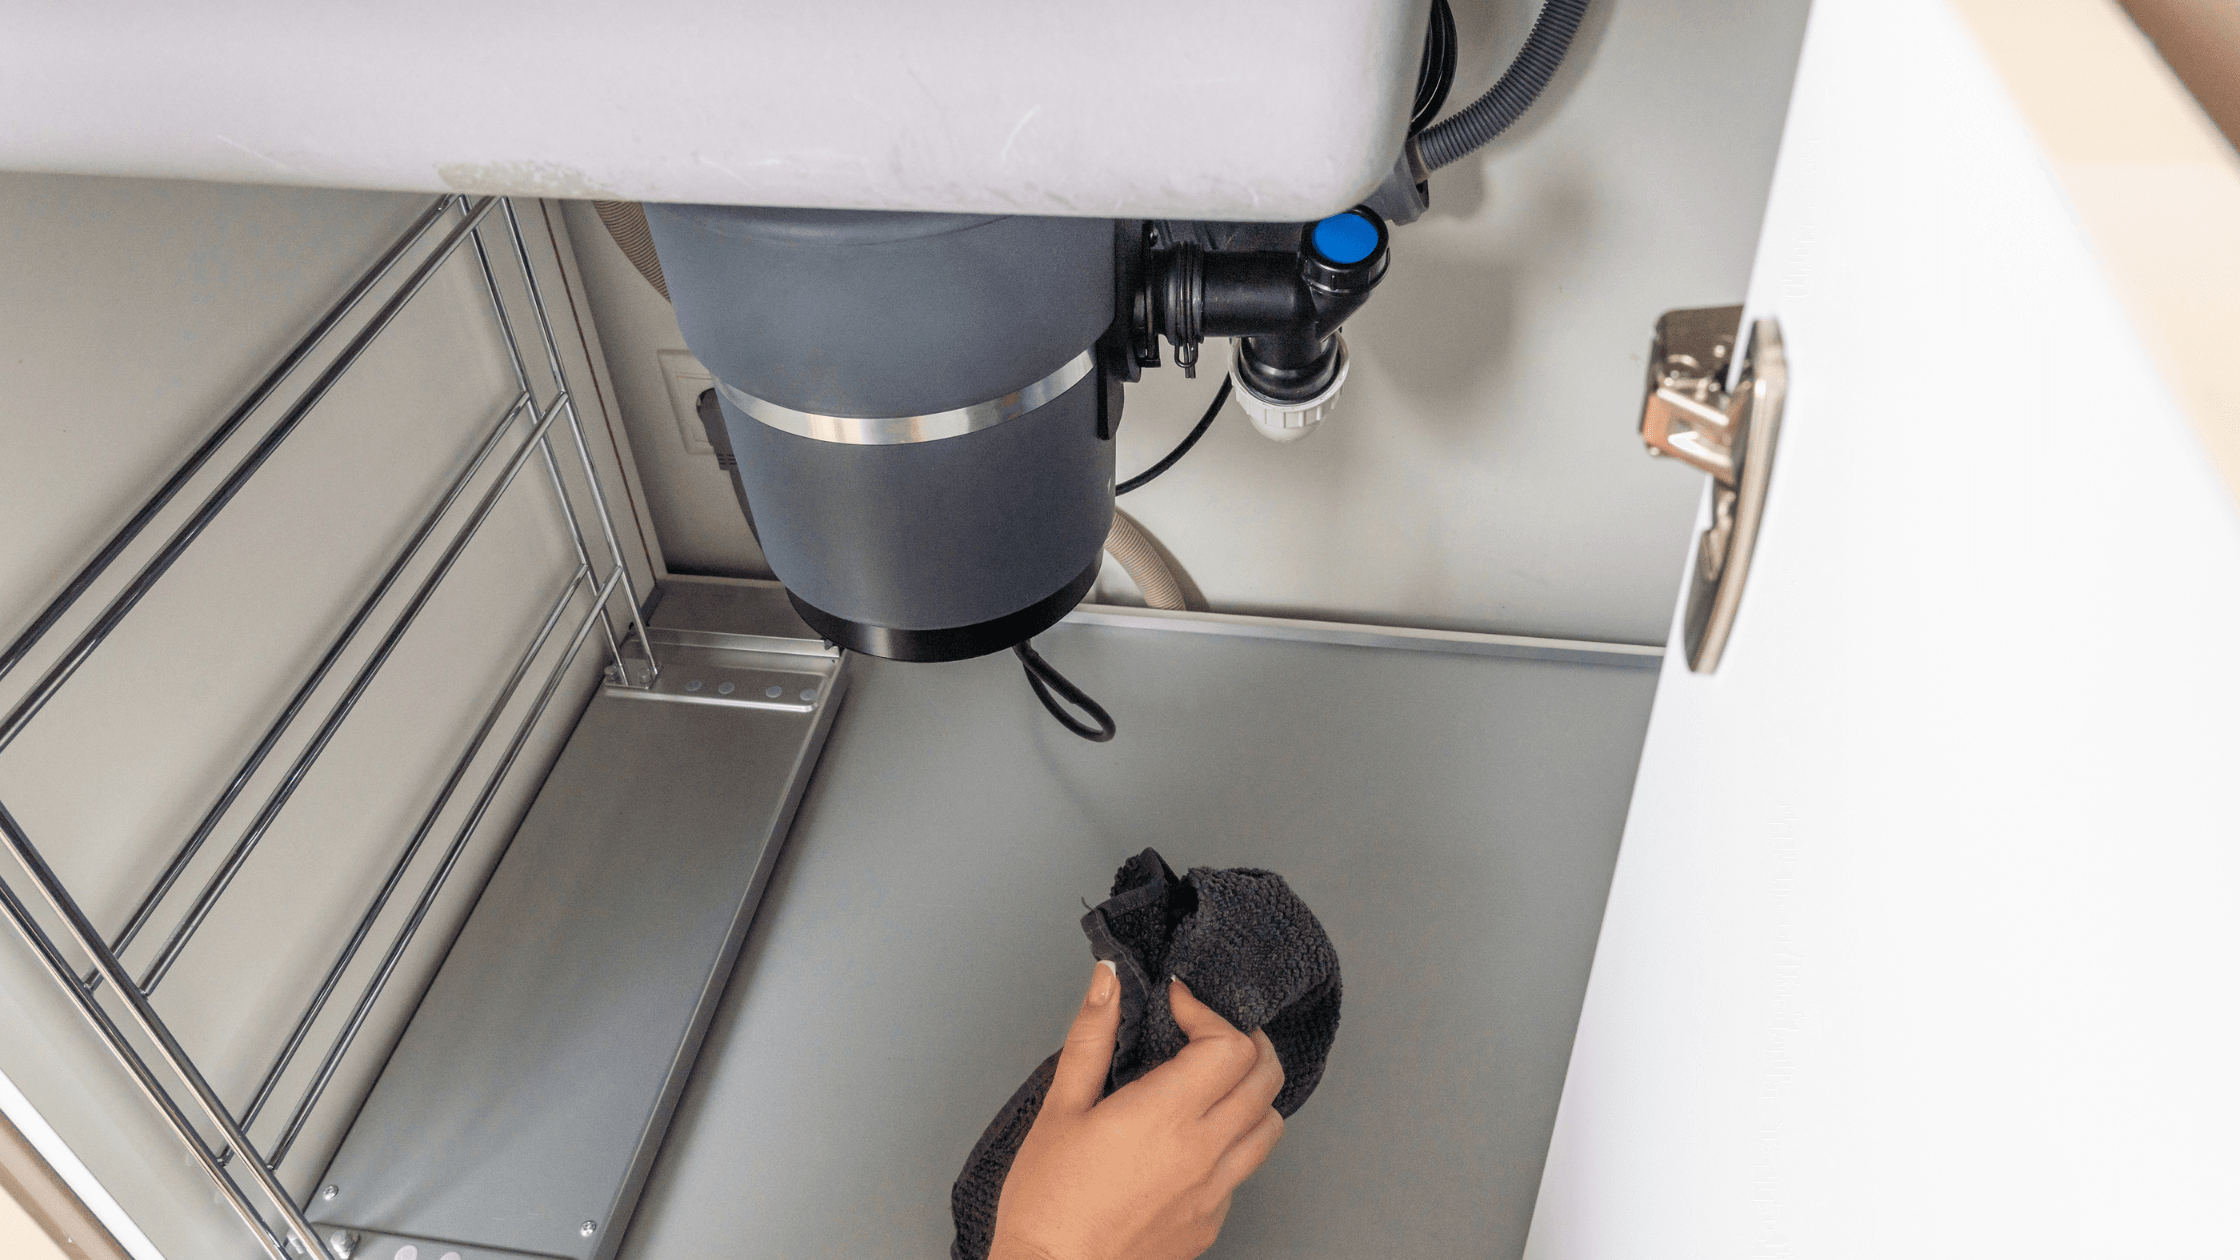
Step-by-Step Overview to Taking Care Of a Leaking Waste Disposal Unit
Switch off the Power
Before attempting any kind of repair work, make sure that the power to the waste disposal unit system is shut off to prevent the risk of electrical shock.
Situate the Leak
Determine the specific place of the leakage and identify the cause
Tighten up Links
Make use of a wrench to tighten up any type of loose links in between the disposal unit and the pipes system.
Replace Seals or Gaskets
If the leak is because of used seals or gaskets, eliminate the old elements and replace them with new ones.
Patching Splits or Openings
For cracks or holes in the disposal unit, usage epoxy or an appropriate patching material to secure the broken location.
Determining the Source of the Leakage
Prior to attempting to fix a dripping garbage disposal, it is necessary to identify the source of the leakage. This can normally be done with aesthetic evaluation or by performing simple examinations.
Visual Inspection
Check the waste disposal unit unit meticulously for any signs of water leakage. Pay very close attention to locations around seals, gaskets, and connection factors.
Evaluating for Leakages
One method to check for leaks is by running water via the disposal system and looking for any type of noticeable indicators of leak.
Usual Sources Of Leaks in Garbage Disposals
Worn Seals and Gaskets
Seals and gaskets play a critical duty in protecting against water from dripping out of the waste disposal unit. In time, these components can wear away, resulting in leaks around the disposal system.
Loose Links
The links between the waste disposal unit and the pipes system can become loosened gradually, creating water to leak out throughout operation.
Splits or Holes in the Disposal Device
Physical damage to the waste disposal unit, such as cracks or openings in the housing, can additionally result in leaks.
Tools and Products Needed for Taking Care Of a Leaking Waste Disposal Unit
Prior to starting the repair work procedure, collect the essential tools and materials, including a screwdriver, adjustable wrench, plumbing professional's putty, substitute seals or gaskets, and epoxy or patching material for fixing fractures or holes.
Checking the Garbage Disposal After Repair Work
As soon as the repair service is complete, check the garbage disposal by running water through it to make certain that the leakage has been resolved.
Preventive Maintenance Tips to Prevent Future Leaks
To stop future leakages, it is important to carry out normal upkeep on your waste disposal unit. This consists of keeping it tidy, preventing placing non-food products or difficult objects down the disposal, and regularly checking for leakages or various other issues.
Final thought
Finally, dealing with a leaking waste disposal unit is a relatively simple process that can be completed with fundamental devices and products. By complying with the steps described in this short article and practicing preventative upkeep, you can maintain your garbage disposal in good working condition and stay clear of expensive repair services in the future.
HERE’S HOW TO FIX YOUR GARBAGE DISPOSAL
WHAT TO DO IF SOMETHING IS STUCK IN YOUR GARBAGE DISPOSAL
If the impeller won’t turn, there’s probably something stuck in the disposal. It could be a steak bone or peach pit, although plumbers report pulling all sorts of inappropriate objects out of disposals, such as bottle caps or aluminum foil. Make sure power to the disposal is off, and look inside to see if you can see the source of the jam.
Never stick your fingers in a disposal. Pull out anything you see with tongs or pliers.
If the disposal still won’t work, it may be time to call a plumber or consider buying a new disposal. GEM Plumbing & Heating is here for all of your garbage disposal needs.
WHAT TO DO IF YOUR GARBAGE DISPOSAL DRAIN IS CLOGGED
Take everything out from underneath your sink and put a bucket or other container under your disposal to catch any water that drains out. Disconnect your disposal from the power supply. If it’s plugged into a wall outlet, unplug it. If it’s hardwired into an electrical box, go to the electrical panel and turn off the breaker for the disposal. Pour ¼ cup of baking soda into the drain, followed by ½ cup of white vinegar. Give the solution a few minutes to fizz and do its work. Look into the disposal with a flashlight to see if you can see an object that might be causing the clog. If you see it, remove it using tongs or pliers. MORE TIPS ON DEALING WITH A CLOGGED GARBAGE DISPOSAL
Never use drain cleaner in a garbage disposal. It can damage the plastic parts inside the disposal. You can also be splashed with the caustic liquid while working to clear the clog. Beware! Never stick your fingers into a garbage disposal. Trust us — not a good idea. In many instances, your dishwasher drains through your garbage disposal. This allows the disposal to grind any large food particles that may be drained out of your dishwasher. There are some jurisdictions, however, where the plumbing code prohibits such a connection. WHAT TO DO WHEN YOUR DISHWASHER DRAINS THROUGH THE DISPOSAL
Run some water in the sink so your plunger has at least a ½-inch of water to create a seal and plunge vigorously up and down several times. You may need to repeat this several times. Run hot water down the drain to clear any residue that remains.
I came across that review about Why Is when scouting around the internet. If you please take the time to promote this page if you enjoyed reading it. Thank you so much for going through it.
Call Us Now Report this page